OUR EXTERIOR: THE PAINT PLAN

Paint Option #1

Getting close to the exterior home stretch: SIDING & PAINT!

We have been patiently waiting for this and now summer can’t come soon enough to get started.
Danny and I have been going back and forth about paint colors for yeeeears. I originally wanted to do green but then both houses to either side are now a navy blue… along with like 3 other houses on our block, so we figured it would blend in too much and decided we wanted to be different, bold, but traditional.

Over a year ago while we were on Whidbey Island we walked by this book store and we really liked their paint scheme, sans the teal trim. After doing more walking and biking around Portland we can across other homes that were similar and we were sold. But… finding the correct tones that worked for both of us proved a little more challenging.

At first we thought we could to color combination on our own especially with Danny’s history in color theory but this color combo had proved to much more challenging than we thought. Danny would mix colors on his own and we would paint samples and still nothing “WOWed” me. It came down to the question: Do you want people say to “the purple house” or “the red house”? ANSWER: RED.


So finally when schedules aligned, we headed over to Powell Paint in SE Portland to meet with their Color Coordinator, Mary. After describing our vision she very quickly, and VERY excitingly, started pulling swatches. And let me tell you: she was spot on. She helped us narrow down the exact historic shades we both wanted. Red-brown but rich with a gold trim and a green-almost-black highlight. In addition to the giant paper swatches she gave us, we also got decent size samples to paint large portions to confirm this is what we want. But it still being winter in Portland, we have not been able to just yet.

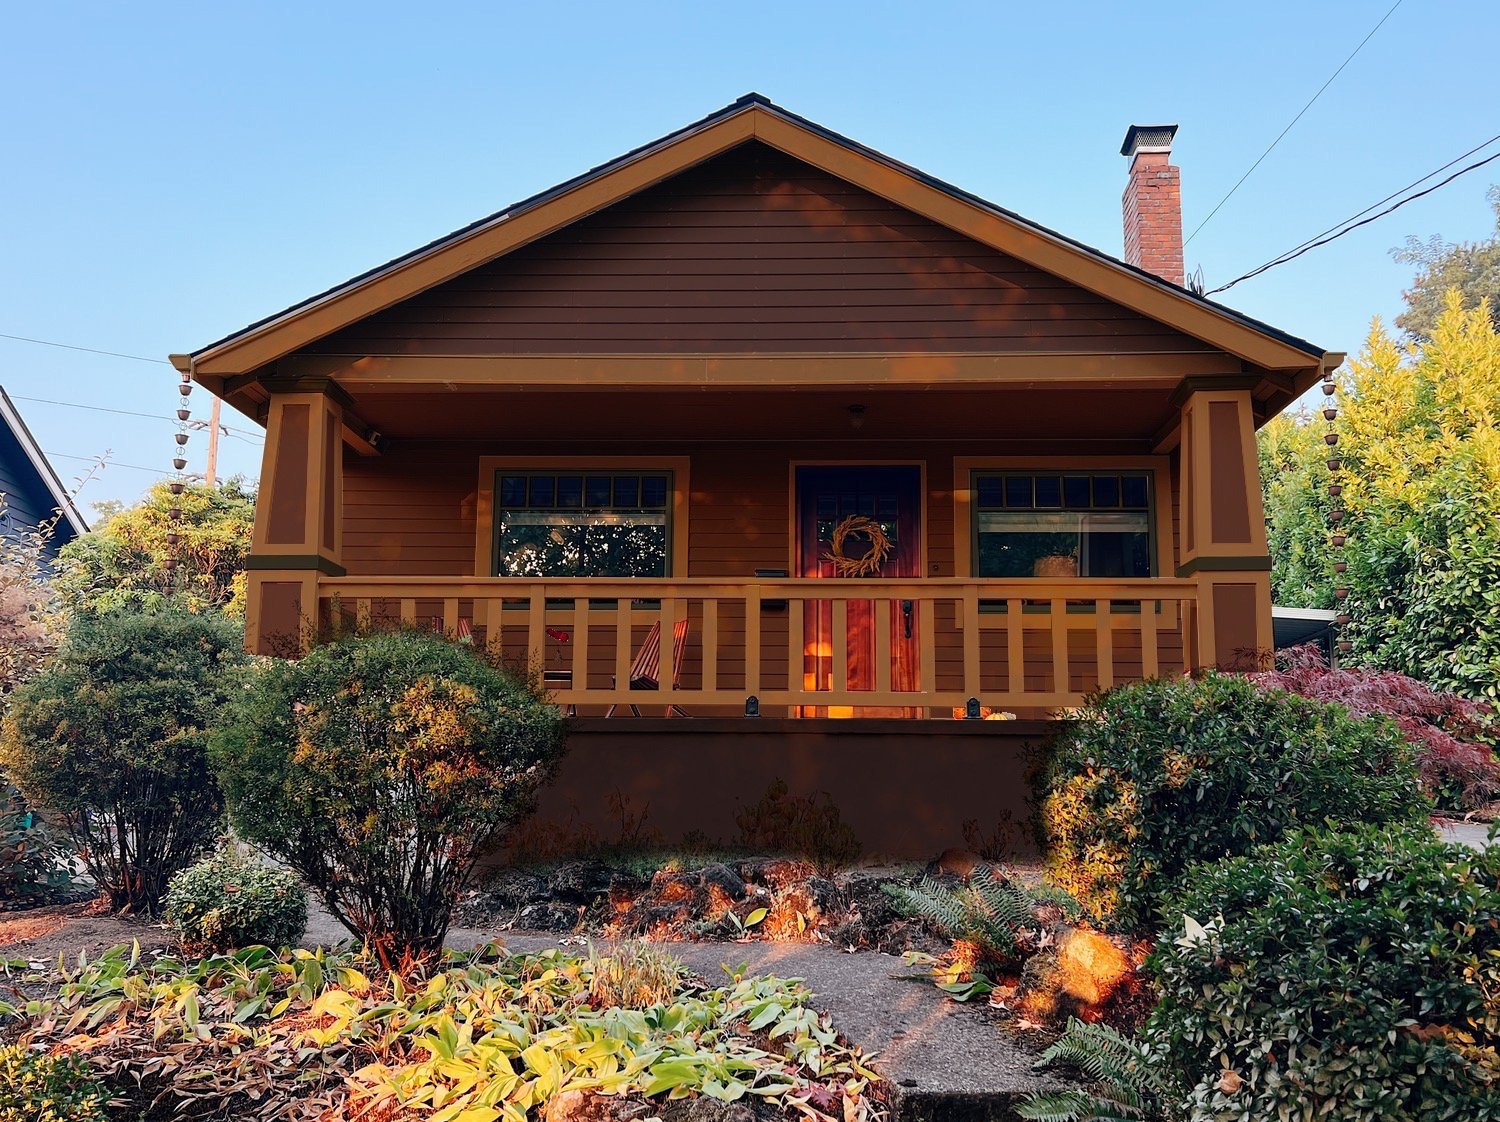
SO once again, here comes Danny with his skills and photoshopped four different variations of paint schemes. The very first option at the top of this post seems to be our favorite with the others following in order. We will also be painting the chimney likely in Waller Green. Excited to test out these colors in real life in a few weeks!

Paint Option #2

Paint Option #3

Paint Option #4

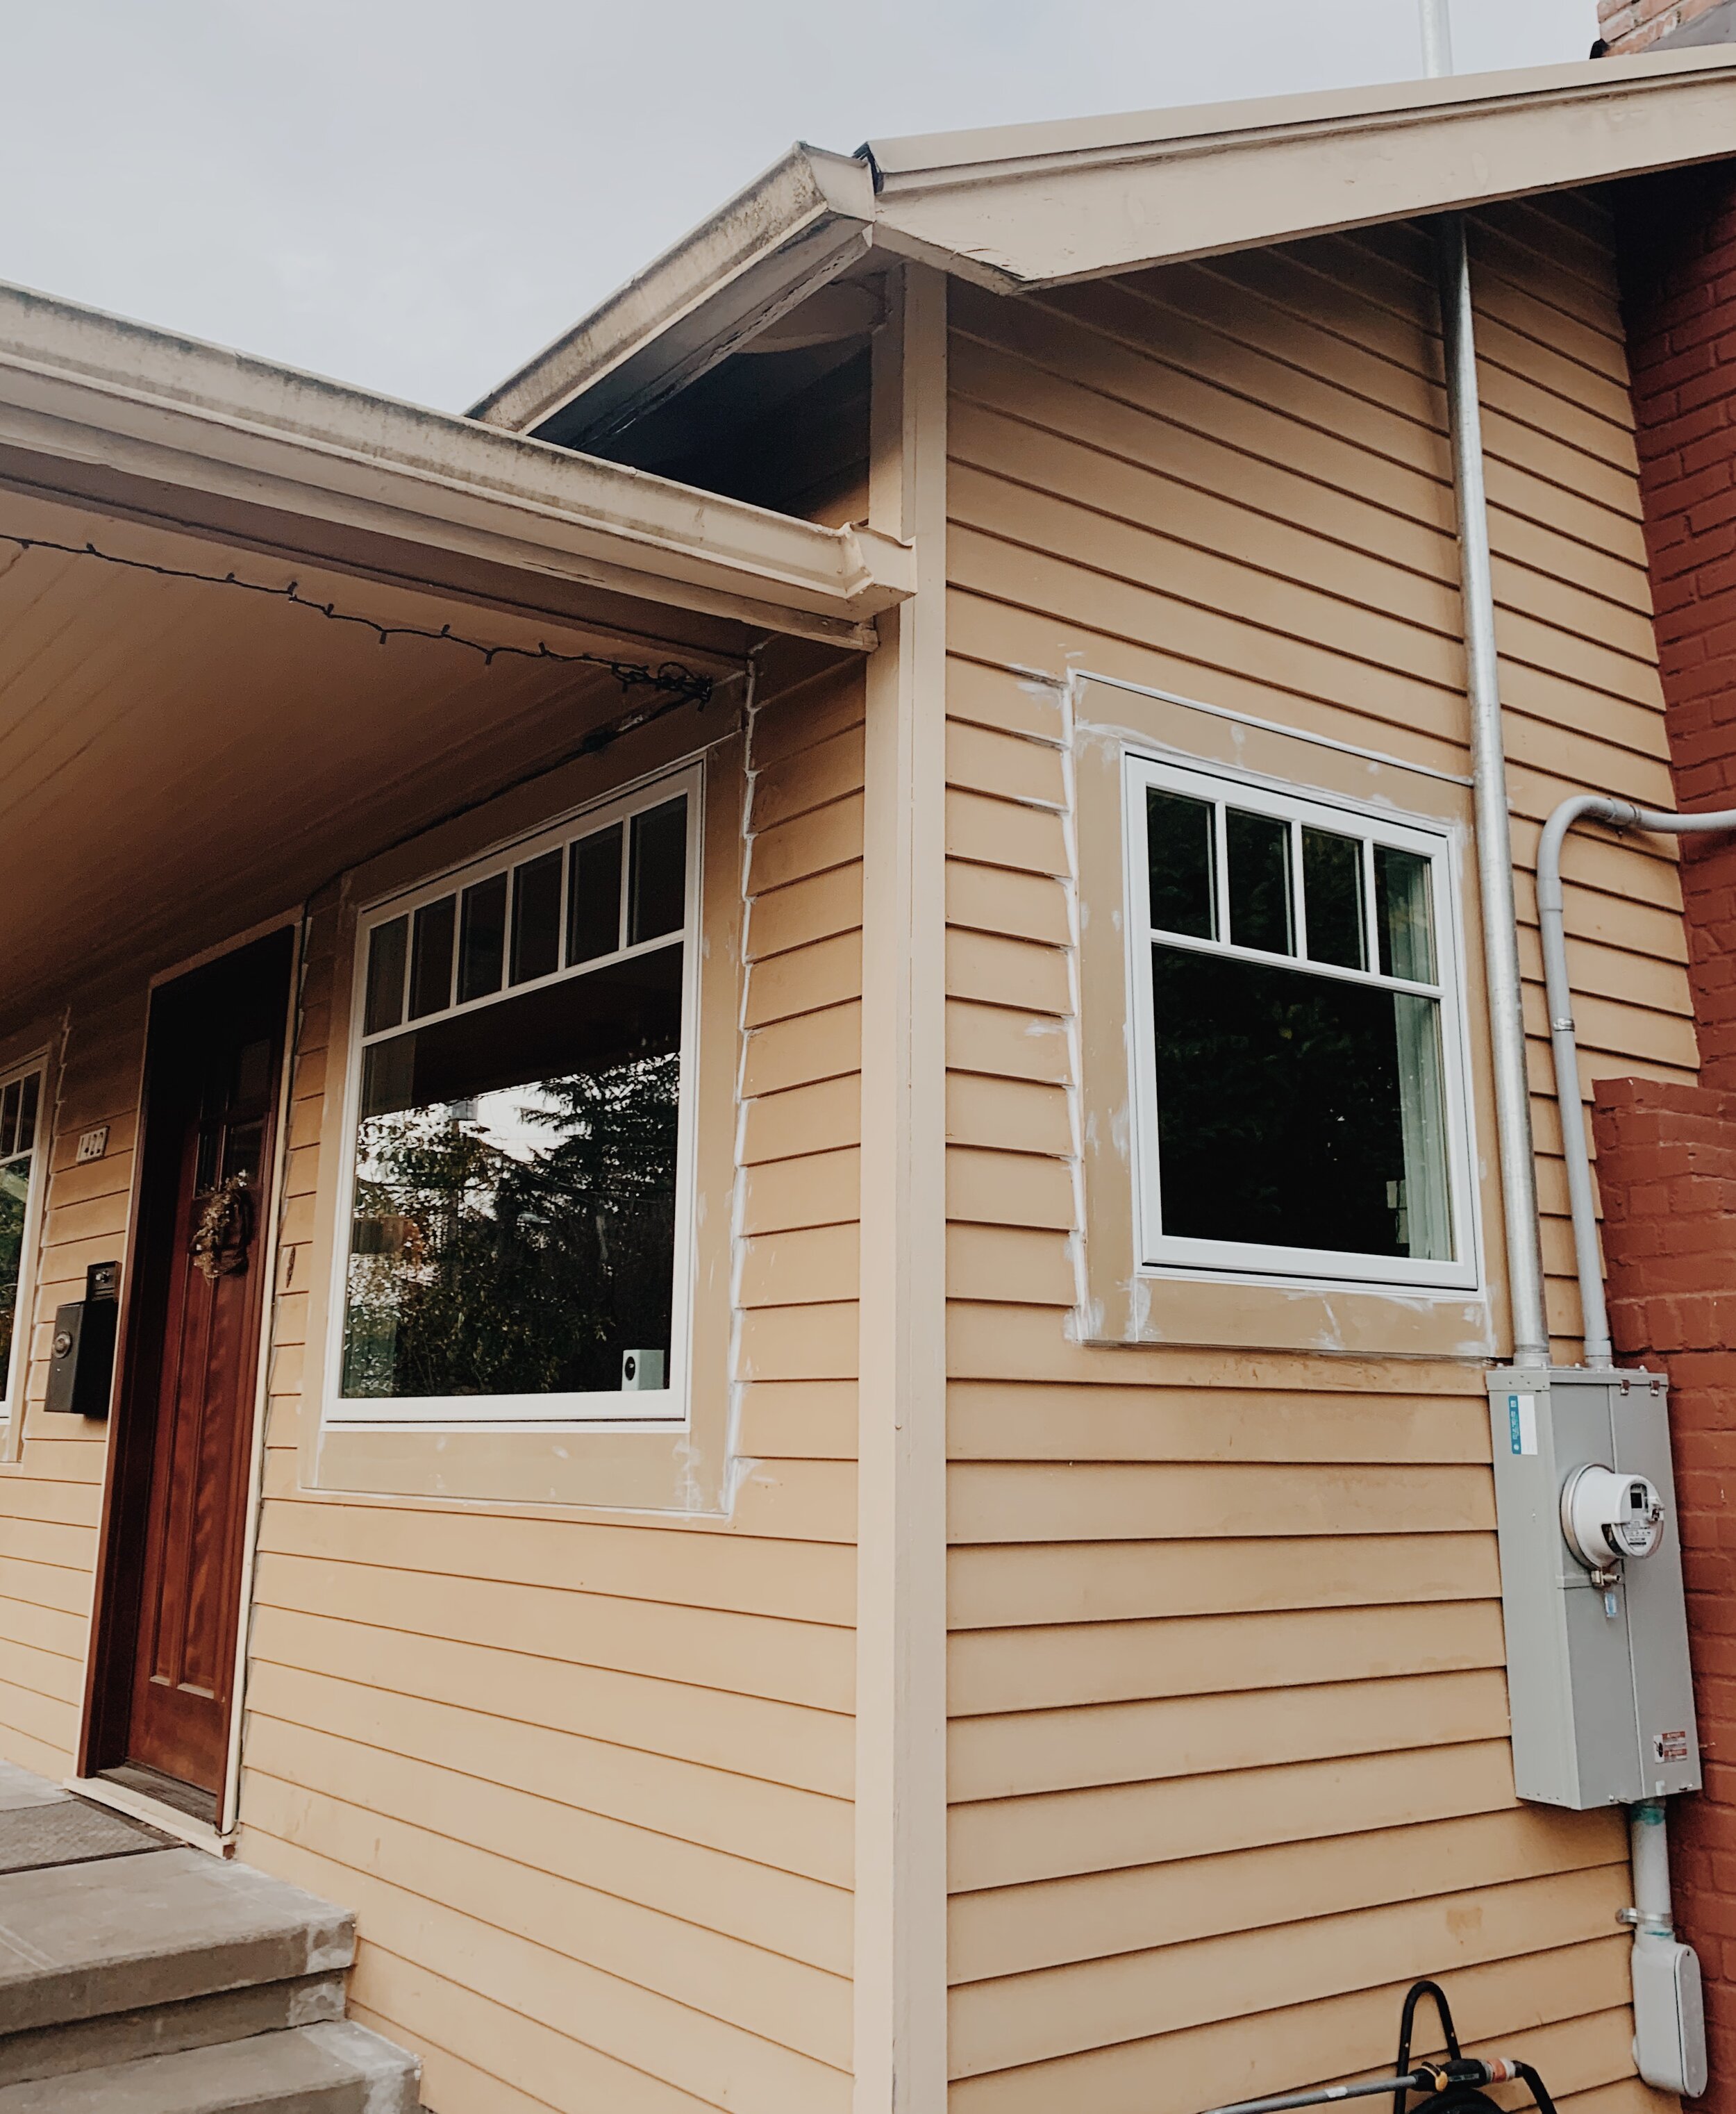
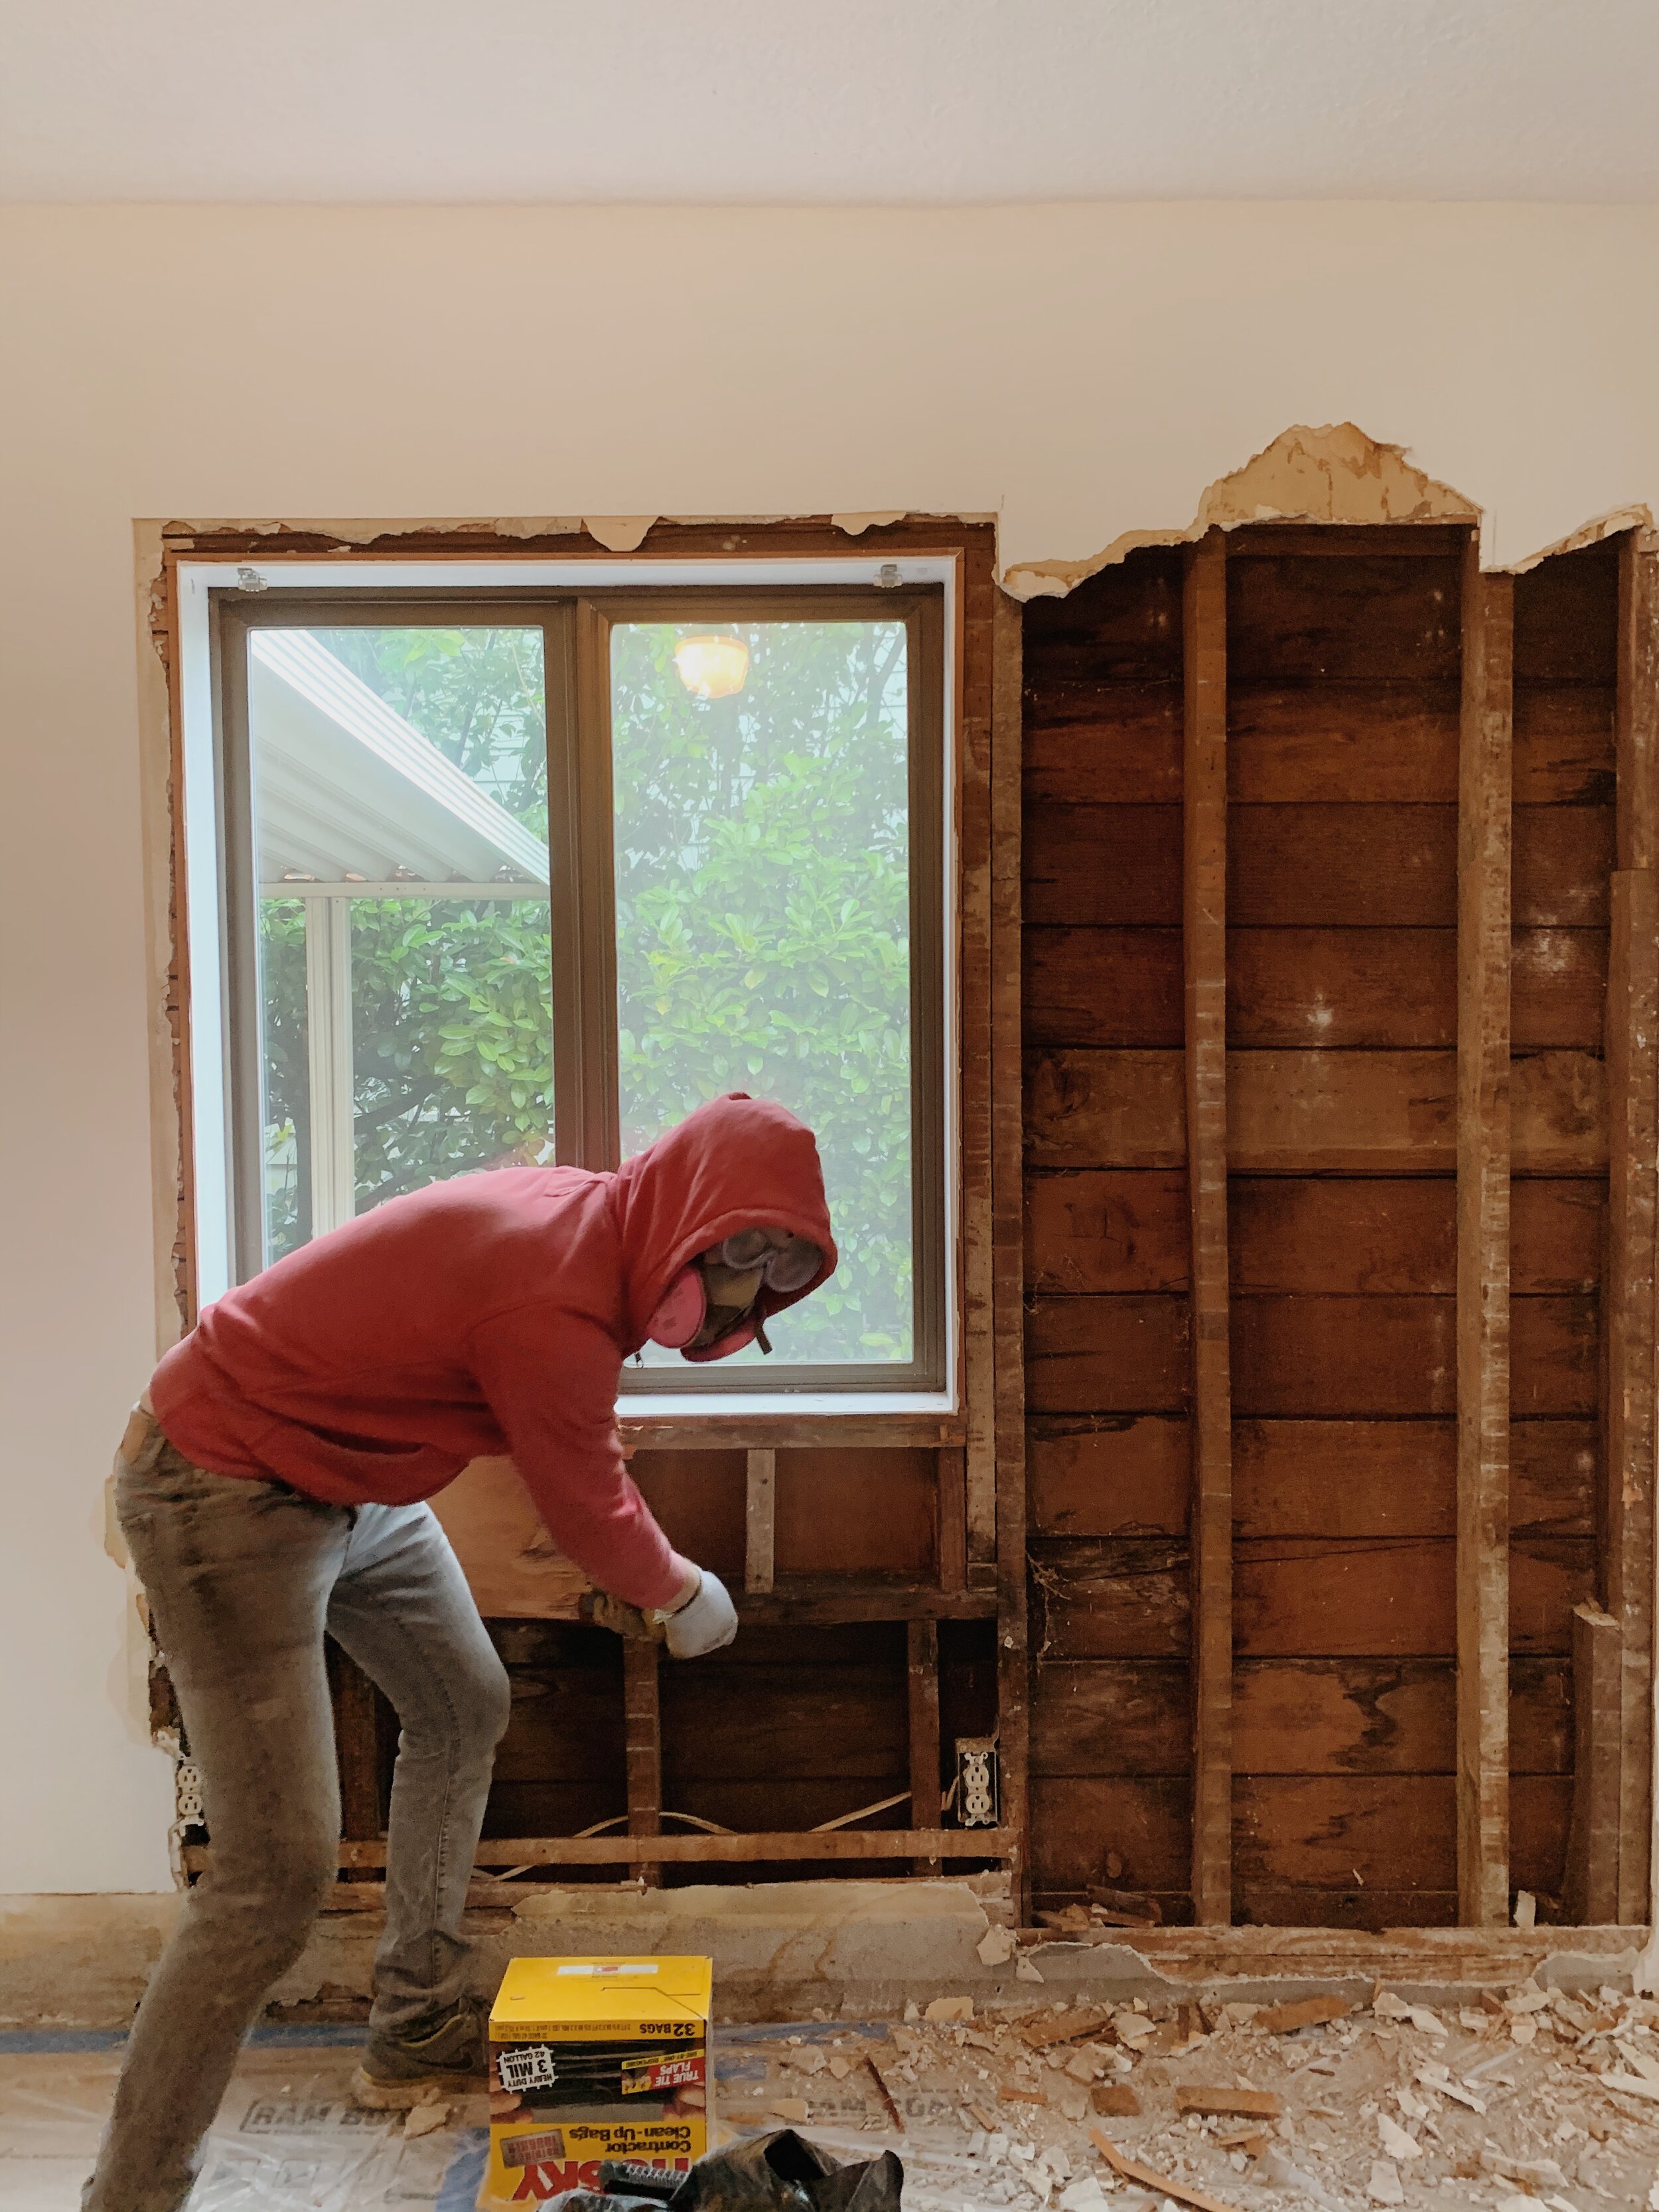
But before the paint can happen: we are also re-siding the entire studio as well replacing some boards on the house. The studio will be completely re-done in Hardy Plank which will hopefully last for as long as we are living here. This will also help with the paint because there will be almost zero prep involved. Other items we are considering adding is maybe a Dentil Shelf on both the front door and across the horizontal beam above the porch and a cupola on top of the studio where we will install our Pomeranian weathervane. Silly, I know but it’s Portland and it’s normal to be weird. Stay tuned!


Follow

RENOVATION NO. 5 : THE OFFICE, WINDOWS, & MORE // WEEK 1

 
IMG_0246.jpg

Here we are in the first week of our fifth renovation: ram board everywhere, zipper walls, and furniture and plants shoved into corners. I’ve never been able to be home to witness the actual work being done so I was excited but also working from home during this has proven to be very difficult noise-wise and somewhat frustrating, especially during Covid. Remembering to wear a mask everywhere you go in your own space has been a change while also packing meals for the day to stay out of the way while they work in the kitchen. But luckily this will be a short renovation with them wrapping up hopefully a week from now.

IMG_0072.jpg

Last weekend Danny and I began to prep for the project by some demo ourselves to save a little time and money. We started by removing the interior trim around the old windows which is usually easy peasy but when we got to the kitchen’s bay window bump out (aka our future breakfast nook) things took a turn. At some point, which we can only assume was the 70s, a previous owner expanded the kitchen by adding in this area. And though we are grateful for this extra space, it also proved to be DIY project with poor measurements and shoty work with tons of shortcuts. So when we finally finished removing the layers-on-layers of wood around the windows we thought we were done and began bringing all the old trim outside. But when we closed the back door… CRASH! One of the old windows completely fell forward and shattered everywhere! Turned out these windows were only being in held in with the trim and the pressure of closing the door pushed it forward! After the shock of the crash and hour long clean up we were able to secure the other two for the meantime. Happy none of us were hurt during or after. What a pain.

AC747C00-7153-43B1-B476-56D055B62346.JPG

Thankfully work began two days later so we weren’t without a window for long. They got to work on this portion first ,and once again, our new windows made a major impact on the space! We went with Marvin’s Elevate (formally Integrity) collection in a cottage style window to match the others in the living room and they are gorgeous. They really give that classic bungalow feel while being energy efficient. For the kitchen bay we made the two side windows operational casements and the center being stationary. We cannot wait until next week when this space is finished and trimmed and we can start planning out the breakfast nook.

58794C5B-14A3-4A11-9E6F-1400E20A4F57.JPG

The other major change took place in the office - the space that set off this entire project. Watching that disgusting, moldy, garden window come out was like ripping off a band-aid. Literally. This window was GLUED onto the side of the house and also not properly installed. No wonder it leaked water and so much cold air. This room is getting the most work done with smoothing the ceilings and changing out the baseboards and adding in the new crown moulding.

IMG_0026.jpg

We also changed the height of this window to align with the other and give us more flexibility of that wall. My only regret is making this a picture window rather than operational awning window. The old window was so large that I knew it would be too big to make it open but failed to consider the function of the smaller size. The other window is a casement and opens almost 90° so we are covered on the egress but still. I have heavily considered re-ordering but the cons on that outweigh the pros. So maybe one day if it breaks or something, I will get the awning. I mean, we don’t open the windows THAT much here in Portland. Next week the remainder of the dry wall work completes as well as all the trim. AND my green velvet sofa has officially shipped and should be arriving in a few weeks just on time! Really looking forward to getting my office back together!

IMG_0016.jpg
IMG_0244.jpg

And lastly and really exciting: progress on the hall closet! We have added in another light on the slope and will be installing shelving, cute hooks, and a rail for coats. I am so excited to see this space finally get finished and to actually have a real closet in this 1924 house! It won’t be the cutest space but it will be functional.

A5011336-46AB-49B5-9949-4DE8465E4569.JPG
IMG_0223.jpg

More updates coming soon!

Thanks for being here!

xo


Follow

OUR LIVING ROOM : UPDATES

 
3E9AC02C-CD1D-436B-8149-E41C70CB31E9.JPG

So it’s been about six months since I have posted any updates on our house. And mostly because it has been that long since we have gotten around to making any changes. Here we go!

WINDOWS

OMFG THE WINDOWS. The most anticipated thing of 2019! For the past year I have felt like a broken record about these! After what seemed like it was never going to happen when with our devastating breakup with our previous contractor: They are in! And they are beautiful!

Snapseed.jpg
96D1E922-0649-474C-B8BF-08E13DE7EA17.JPG

Why was this such a big deal? The windows that came with the house were from the 70’s with aluminum framing that let cold air in and were so fogged in places from moisture getting between the panes that they were worthless. I got some mixed opinions about removing the garden windows but I honestly hated them (believe it or not) and am so happy they are gone!

040B325B-0999-4CB8-BC81-5B37875BFA32.JPG
0417C377-A7CB-4D10-B854-D0A7AE8E829D.JPG

The third window on our main living room wall was the biggest change. It was different size than the other two so we decided to shorten it a bit so they are aligned. I struggled with this idea at first because being in Portland, you want as much a light as you could get. But turned out to be just fine - just as Danny reassured me. The fun part about this was that since we were going to re-frame this window we got to demo the wall for new dry wall. And it’s a good thing we did, too because once we got in there we discovered that there wasn’t an insulation! Again, and another reason why our house always seemed cold and drafty. AND we found the ORIGINAL deed for the house in the wall! It was pretty damaged but were able to make out the original sale price of $4900 in 1924. So cool! I hope we find more hidden things in the walls later and I don’t mean bones. Where’s my can of cash???

437C23FA-E052-4DB1-93E8-D8DED505E974.JPG
9926D174-9E7F-41EF-B6D1-346326D24CD8.JPG
82215810-152D-4063-A4B1-6AE41EBEFD5A.jpg
ED902AAE-FA1D-4CFE-875D-802CE5B0E8D3.JPG
AAD36678-DA3F-4B73-B550-C62F36A364E3.jpg


We matched the new windows with little stair window from Marvin through Parr Lumber and they are a dream! Since we are working on having the house match its 1920’s origin while modernizing, we picked the divided lights to be real wood on the inside and the fiber glass on the outside for weathering. And in the original style, we have the two front to just be non-functional picture windows, then the two flanking the fireplace to be opposing casements and lastly the one near the kitchen to be an awning which I think is so fun. Now, I can’t wait till warmer weather and to have all the windows open! Plus the plants are going love it!

C321DA45-21F4-4226-8B67-A9AA7531DA94.JPG

CEILING

Say what you want about older homes but I cannot stand textured ceilings. Since we are not in Los Angeles anymore, I am not talking about the awful popcorn ceilings either but this kind of rough texture like cream cheese spread on a bagel. I get it: it hides imperfections. But it also absorbs depth and I find them to be dingy looking. So: we smoothed the ceilings! Which in the process discovered the the ceiling were not level (you seen see the blue chalk line across showing the difference) so we fixed that too.

8.13-10.jpg
F59A62EA-08AB-4ABE-81BB-3FD4D7CE6CDB.JPG
0258667B-810B-46B7-BC88-F4F694604874.jpg

Earlier this year when we removed the divider we discovered the ceiling was two different heights from the “two rooms.” So instead of demoing and starting over we were able to add a carefully cut piece of dry wall and then skim coated the rest. I can’t put into words how much I love it. It’s so nice to stand in the dining room and see that now these two rooms are finally consistent with each other!

Here is the living room from the listing on the house when we bought it:

house old.jpg

And NOW!

60E6CEF9-D9EC-4295-B2BE-1383F72086A2.JPG
C5223984-0186-402D-8494-04EF2754AF2E.JPG

More of the process…

68C04283-9884-45FE-A671-FB3CBB6C3F79.JPG
B56C84C2-D916-4A9E-A627-83C680052317.JPG

TRIM, BASEBOARDS, MOLDING, AND ALL THE PAINTING

Ahhh and of course a room is not complete without proper trim! Each window now has the beautiful but simple craftsman style trim, 9” baseboards across the room and classic crown molding from McCoy Millwork. Besides all the dust from the new drywall, the painting was the most painstaking part of it all. It takes so long and there were so many steps with all the trim and different paints. We painted the room to match the dining room in Benjamin Moore Cloud Cover in Eggshell, the trim is pure white in satin, and the ceiling in a flat white. The room looks so classic, light, & airy considering it’s such a small space (25’ x 11’). We cannot thank our beautiful friend, Nikole, for taking so much time out of her life so constantly help us with painting and am forever grateful for her and her steady hand.

E86F6DA2-45D5-48BF-B172-57D42BB88653.JPG
945A7F6F-42CC-4E5C-848B-45B1E43A3054.JPG

We finally moved all our furniture back in just in time for the long MLK weekend and my birthday. We haven’t hung our window coverings back up yet but I am okay with that. I love being able to sit back on the sofa with some coffee (or wine) and admire all the natural light. P.F. Candle Co. was also so kind to send us some goods including their new scent, Sunbloom, which smell like a dream and brings back memories our hometown in California! It makes our space feel even more welcoming and warm - eps on these dreary winter days (Thank you!).

I was hoping with this renovation I would be able to find new sconces but I had no luck finding ones I loved with a rotary switch without costing a ton. We don’t use them that often so I didn’t want us to go through the hassle of re-wiring them to the switch either. So I spray painted them using the same color I used for the hoop log holder a few years ago and I think they turned out awesome. And it literally costed us nothing.

B545A94C-74A6-45E3-9195-564088ABE548.JPG
86BC2866-3B02-407E-87D2-6F96D954FE48.JPG
D0D1BE97-75F8-47DD-963C-20C0E0C03D17.JPG
C4518C10-B311-43EB-B9D2-2B9AF3D348A0.JPG
CFDD40E1-5086-4F92-93FA-D26B2FA3F937.jpg
85D4D377-F856-47ED-9A19-0256BF3BDBAE.jpg

We will likely be taking 2020 off from any major renovations to save for the main bathroom remodel as well as fresh the hallway and guest-room/office with matching ceilings and windows and maybe actually take an actual vacation! And maybe this year we will get a new sectional sofa, coffee table, and lights but for now this is great. I am finally feeling like this little house of ours is becoming exactly what we envisioned. This house has definitely taught us (and mostly me) patience and how to manage realistic expectations.


Follow